
Carson Wood Flooring handles wood floor refinishing in Carson, CA, serving surrounding cities including West Carson, Compton, Wilmington, West Rancho Dominguez, East Rancho Dominguez. After more than 20 years on hardwood, most of our refinishing work is on the oak that was nailed down in this area’s postwar tracts, much of it hidden under carpet until the day someone pulled up a corner to look.
A refinish takes that worn, scratched or grayed floor back to bare wood and builds a new finish on top. Done well, it gives an old floor decades more life for a fraction of the price of replacing it. Done badly, it leaves chatter marks, dished boards and a finish that peels within a year, which is why most of our effort goes into what happens before the sander ever starts.
More than three quarters of Carson’s houses were built before 1980, so we assume every floor has history. That means checking the wood’s remaining thickness, looking for old tile or black mastic in adjoining rooms, and using lead-safe practices around painted baseboards and trim in any house built before 1978.
What a Full Refinish Involves on Carson Oak Floors
Checking the Floor Before Any Sanding
We start by pulling a floor register or a threshold to see how much wood sits above the tongue, because that number decides whether a floor can take a full sand at all. We look for exposed nail heads, earlier patch jobs and boards that have already been sanded thin. In rooms where carpet came up, we also check for tack-strip holes and staples that need pulling or filling.
If the floor meets old vinyl, 9x9 tile or black adhesive anywhere nearby, we treat it as a possible asbestos question before any machine runs. That step costs nothing to take early and a great deal to skip.
The Sanding Grit Sequence
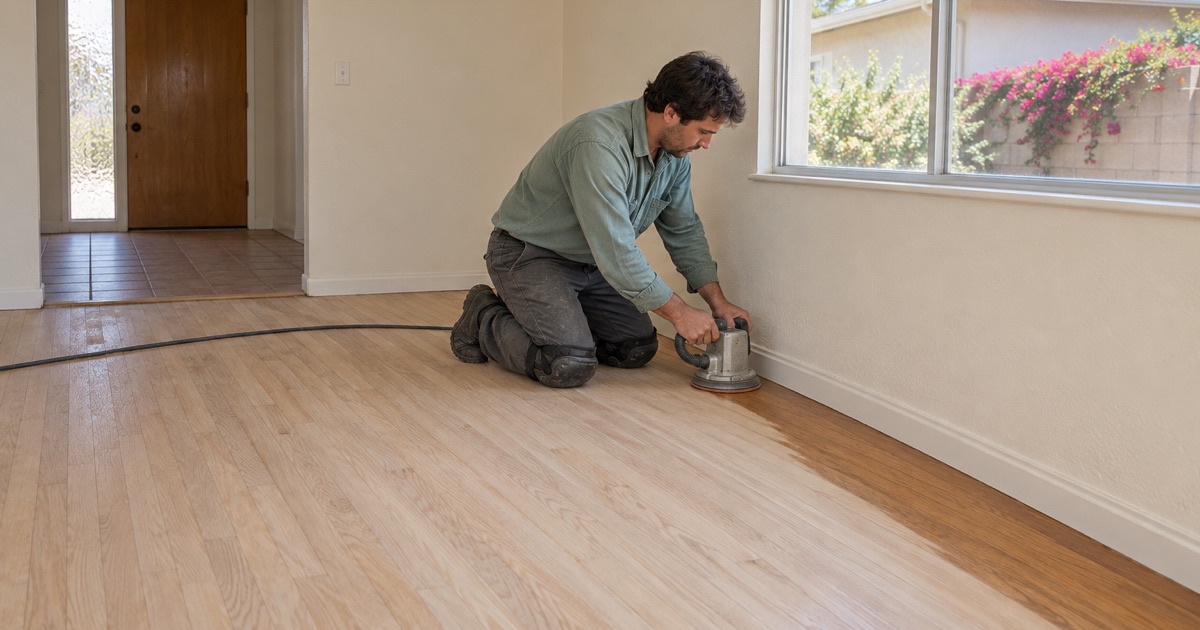
A drum sander does the field of the floor, an edger reaches along the walls, and an orbital sander blends the two so the transition does not show. We work through a grit sequence from coarse to fine, and each pass removes the scratches the one before it left behind. Skipping a grit to save time is how floors end up with swirls that only show once the stain goes on.
We run a dustless sanding system connected to extraction during every pass. It does not make sanding dust-free, but it captures most of what would otherwise settle on shelves, vents and bedding in the next room.
Stain, Sealer and Topcoats
Once the floor is sanded smooth and vacuumed, we apply stain if you want a color change, or go straight to a sealer for a natural look. The sealer controls how the topcoats bond and how evenly the wood takes color. Topcoats follow in thin layers, with light abrasion between coats so each one bonds to the last.
Choosing a Finish That Suits Your House
Waterborne Polyurethane
Waterborne polyurethane dries clear, keeps white oak and light stains looking fresh, and allows the quickest return to the room. It also carries the least odor, which matters when a family is living in the house during the work. Modern commercial-grade waterborne finishes wear well enough for busy households with kids and dogs.
Every finish we apply in Carson meets the 275 g/L VOC limit for wood coatings under SCAQMD Rule 1113, which governs what can legally be applied in the South Coast air basin. We will not bring in a product from outside the district that exceeds it.
Oil-Modified Polyurethane
Oil-modified polyurethane ambers as it ages, giving red oak a warm honey tone that many owners of 1950s and 1960s houses want to keep. It takes longer to cure and carries more odor than waterborne products, so it suits a job where the household can stay out of the rooms for longer. We use compliant formulations only, and we give you a longer written cure schedule to match.
Hardwax Oil and Sheen Level
A hardwax oil finish soaks into the wood rather than forming a film on top, giving a matte, natural look. It shows wear sooner than polyurethane, but a scuffed area can be cleaned and re-oiled without sanding the whole room. It suits owners who would rather maintain a floor a little at a time than refinish it all at once.
Whichever finish you choose, sheen level changes how the floor looks day to day. Matte and satin hide dust and fine scratches better than semi-gloss or gloss, which is why most of the floors we refinish end up in that range.
Refinishing Problems We Fix Along the Way
Gray Boards, Pet Stains and Board Replacement
Wood that has gone gray where the finish wore through usually sands back to clean color. Black stains from pet urine or standing water often go deeper than sanding can reach, so we test them with a pass of the sander before deciding. When a stain will not lift, we cut out the board and weave in a matching one before the whole floor is finished, so the repair takes the same stain and topcoats as everything around it.
Gaps, Cupping and Old Filler
Narrow seasonal gaps in solid hardwood are normal, and filling them with rigid filler often ends with the filler cracking and falling out. We only fill gaps that stay open year-round, and we use methods suited to the width. Where boards have cupped from moisture, we find and fix the moisture source first, because sanding a cupped floor flat before it dries can leave it crowned later.
Floors Damaged by an Earlier Refinish
We regularly see floors that someone else sanded with the wrong grit sequence, left chatter marks from a drum sander held too long, or dished soft grain by sanding too aggressively. Some of that can be corrected with careful resanding, provided enough wood remains. We tell you honestly when a floor has been sanded too thin to take another full refinish, and what the alternatives are.
Our Step-by-Step Wood Floor Refinishing Process
Step 1: Walkthrough, Readings and Written Estimate
We walk the floor with you, check its thickness and condition, take moisture readings and note anything that needs repair before sanding. You receive a written estimate that lists the rooms, the repairs, the finish system and the number of coats.
Step 2: Containment and Preparation
Furniture comes out, doorways are sealed with plastic, and vents are covered to keep dust out of the rest of the house. We pull shoe molding where needed and set nails that sit proud of the surface.
Step 3: Sanding and Repairs
The floor is sanded through the full grit sequence, and board replacements and weave-in repairs go in between passes so they sand flush with the field. Edges and corners are finished by hand where the machines cannot reach.
Step 4: Stain and Finish Coats
Stain goes on first if you chose one, followed by the sealer and topcoats in the sequence the product requires. Each coat is lightly abraded before the next so the layers bond into one continuous finish.
Step 5: Cure Schedule and Handback
Before we leave, you get a written schedule showing when each room can be walked on in socks, when furniture can go back, and when rugs can return. We reinstall shoe molding and walk the floor with you to confirm the finish is even.
- 20+ Years on Wood Floors
- Moisture Readings in Writing
- Air-Basin-Compliant Finishes